From simple beginnings

Posted: February 7, 2020 in Uncategorized

I enjoy all aspects of bonsai but, normally what we see on the internet is mainly conifers re-made, styled, made to look nice, etc. This post is hopefully something a little different than most and I hope can show what can be done growing native tree’s in their native environment in a relatively short time.

I have found that although perhaps deciduous can be a little generic to look at and thus sometimes considered a little boring, making deciduous tree’s is the most satisfying work in bonsai.

I purchased a shohin trident maple from a nursery whilst at an auction in the summer of 2015. The tree was already had a good image but, it had spindly branches. They hadn’t been grown out to get thicker and it had a good leaf character thus slower to put girth on. The negative point when developing higher quality trident maple’s is it takes four times the time to make the same tree. In the end though the possible ramification is way higher quality thank normal trident’s.

I decided to change the front slightly and remove a branch. This was the tree after a year of growth.

The position that I removed a branch was in the front right here.

As you can see the scar had almost completely healed at this point. Instead of throwing the branch away I decided to strike a cutting.

The cutting did in fact take and I re-ported it at the same time I was re-potting this tree. As doing so I saw that I had done well and had plenty of strong long roots. Seeing this I thought it had good potential to make a root over rock. I then scoured around looking for a decent rock to use.

A standard here in Japan for root over rock style is to tie the tree with wire. I’ve seen them with all kinds of wire but, I decided to use aluminum and use rubber tubing. Most often especially with bigger tree’s the wire is left to bite and be swallowed inside the roots. I wanted to avoid this and this is why I used rubber. It wouldn’t stop it biting but, it should be enough so that it wouldn’t be swallowed completely as long as it was kept an eye on.

One initial tie to hold it in place

The root’s fully tied down.

The tree was then planted in normal deciduous mix, plastic mesh tied around and filled with river sand. I decided to use river sand as I thought it would encourage the roots to grow faster searching for moisture. It did in fact work but, I would like to try using akadama one day as the do in field growing. I think would be slower but perhaps the root formation, with selection would be more aesthetically pleasing. My feeling is sand created straighter not so interesting roots.

Moving on a growing season later (March 2017), with nothing done but, general care and left to grow freely. This was the result.

For the next stage I removed the plastic mesh, washed off the sand and cut the wire.
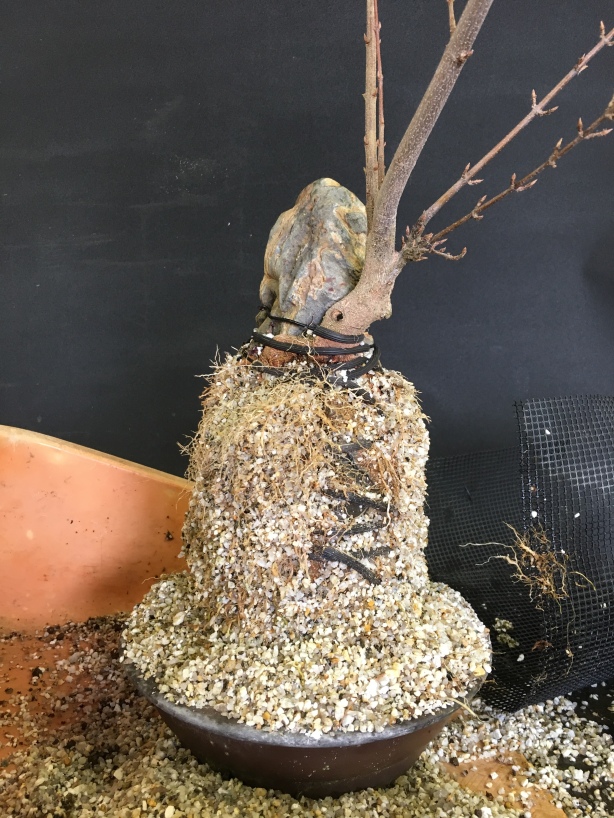
I then made root selection and removed unwanted fine roots.
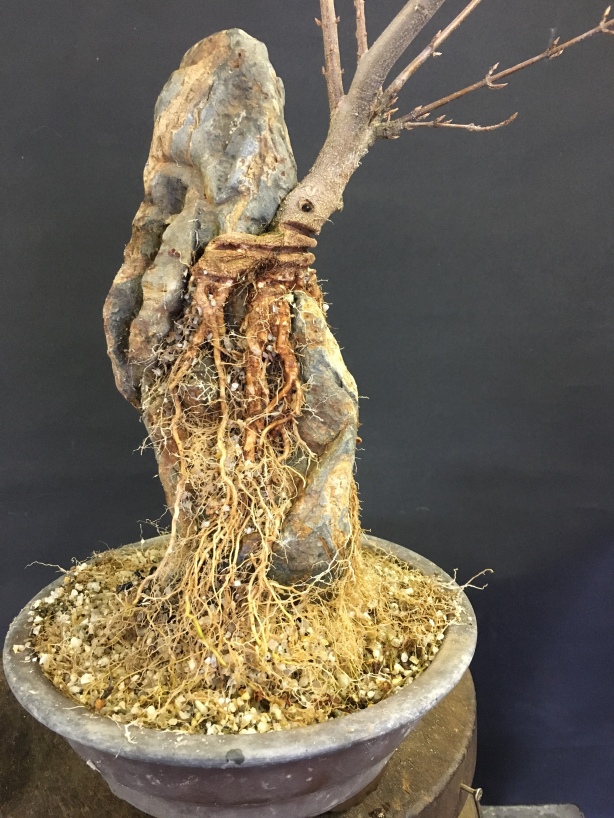
As you can see the wire did bite in to the tree quite hard but, this will disappear and grow out, in a relatively short time.

It had developed nicely but the bottom third of the root’s were too young to be exposed so I retied them and replaced that section with using the same technique as before.

I felt at this stage the tree had thickened sufficiently and the sacrificial top could be cut hard and start to make some structure with what was useful.

Here I didn’t cut back to the first pair of buds because the tree wasn’t re-potted. This is to control the next push of growth. If the tree was to push very hard the internode distance may well be too great and rent it useless. By leaving some extra potential sacrificial bud’s we can control the next flush of growth.

During the summer I did a little structural wiring and in November (same year) this is the progress it had made.

I removed leaves, wire and cut back the structure.

Front

Back

The left hand side of the tree was developing nicely but, the direction of the tree was going to flow right so I needed to work on the right side and form a main branch. The plan is have the main branch come from the back and swing to the front cascading down.

Getting the tree back in the workshop next spring (March 2018) it was time to remove the remaining mesh to see how the roots had developed on the lower part.
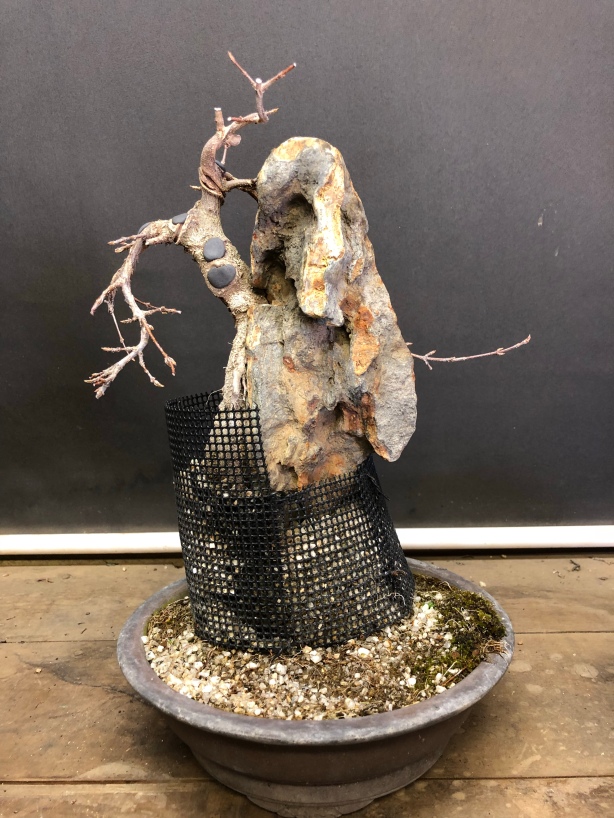
After the same technique used the exposed roots where then finished enough to leave them exposed. From then on it is just a case of building more branch structure and then ramification.

Nearly a year and an half on in August 2019, with growing, wiring, cutting and defoliation this is how the tree looked.

The trees roots had hardened off well and it was starting to look a little more like a tree.

This was the Autumnal colors at the end of the year. For the future I think I will cut back the main branch maybe a third to create more taper and better structure but, for the most part I will defoliate and grow slowly. The tree has a long time before it will be close to it’s finished image but, I’m pleased with its progress and look forward to seeing it develop in the future although I know it will be slow. Thanks for reading.
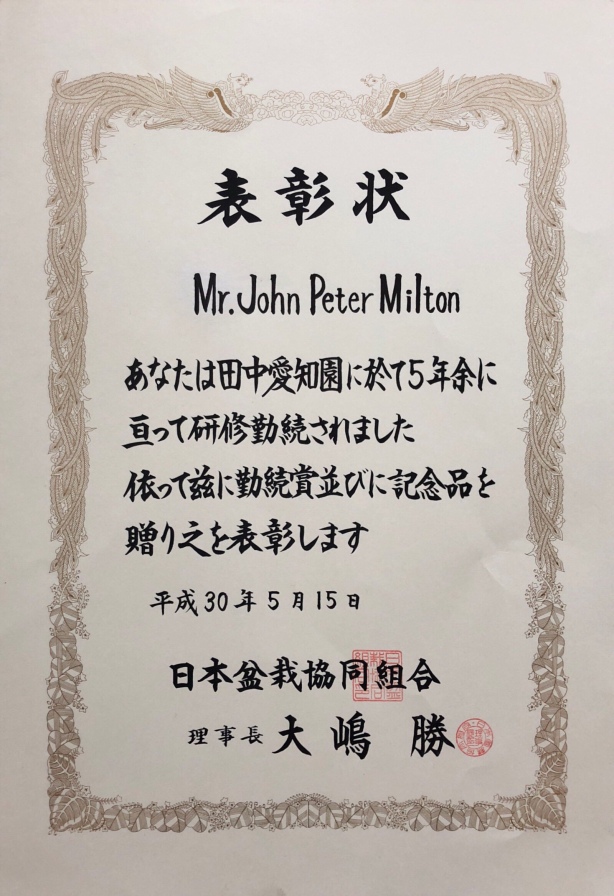
I would first like to apologize for the lack of content for a long time. It isn’t without reason but, I’m not going to into that right now. What I would like to say though, is that I have now been in Japan for five years now, it has been a roller coaster of up’s and down’s to say the least. I have a lot of respect for anyone who comes and does any length of time as a full apprentice. I believe no matter where you do your apprenticeship it is never an easy task, everyone sacrifices a lot and it can only ever be taken a step at a time.

After all this time, I’m proud to say that I have received my certificate from the Nihon Bonsai Kyōkai/Japan Bonsai Association and I have finished my apprenticeship.

I would like to thank Oyakata, Daiju-en Oyakata, fellow apprentices that have we have worked together and soldiered through, all friends who have helped and supported me and my loving family in the United Kingdom. Most of all I would like to thank my wonderful loving wife and our children, without your help & love this most truly wouldn’t of been possible and makes it all worth doing.
The title of this post is a quote from Winston Churchill, who needs no introduction at least back home anyway. I thought it was slightly apt as, although my time as an apprentice has finished the start is only in sight and from now my hope is only to continue to support my family doing what I love, spreading bonsai where I can. Yoroshiku onigaishimasu!

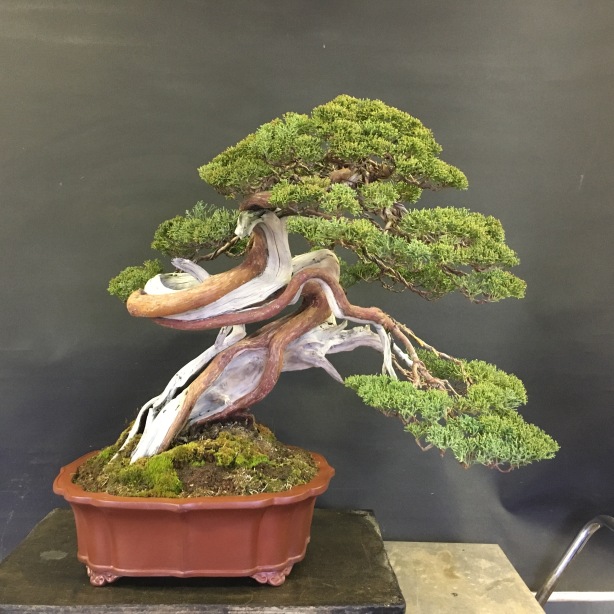
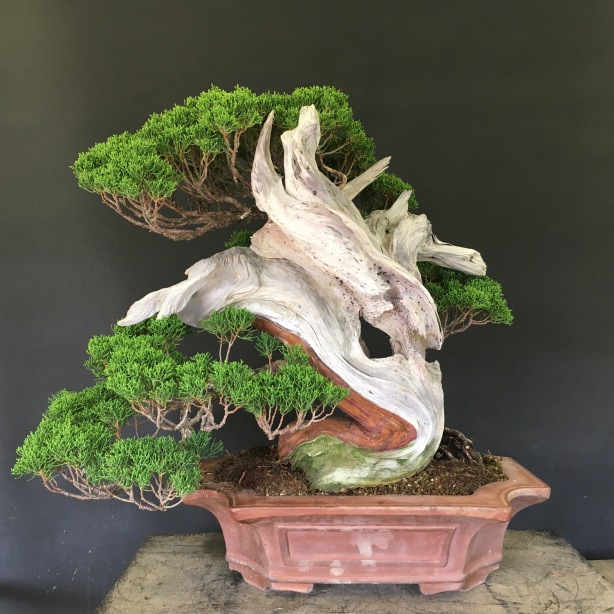
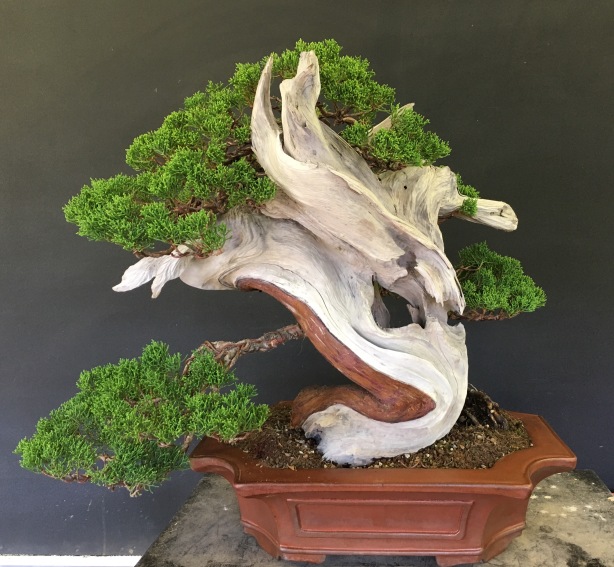
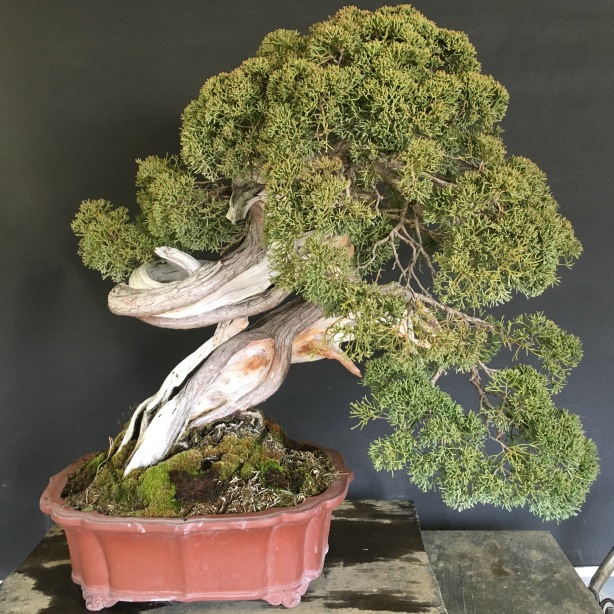
Oyakata gave me a tree a while back to wire, style and make look nice. A mountain collected juniper that had already been re-potted and the front chosen some time ago. It was just a case of recreating structure, making pads and trying to make a clean look, whilst still a natural feeling.
The tree to start wasn’t looking in bad condition and was looking very natural but, in good condition for a wiring to make look good.

I started with normal shimpaku clean up, cleaning the foliage live vein, etc and then on to wiring.
This was the final result.

  I opened op the front to show more trunk, shari and live vein. Separated some of the bigger pads into smaller pads to give the tree more depth and better flow.

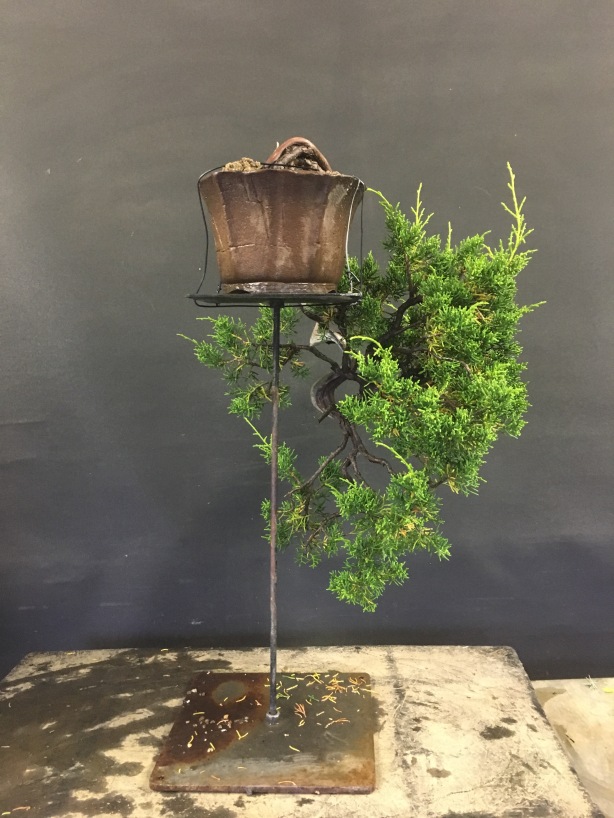
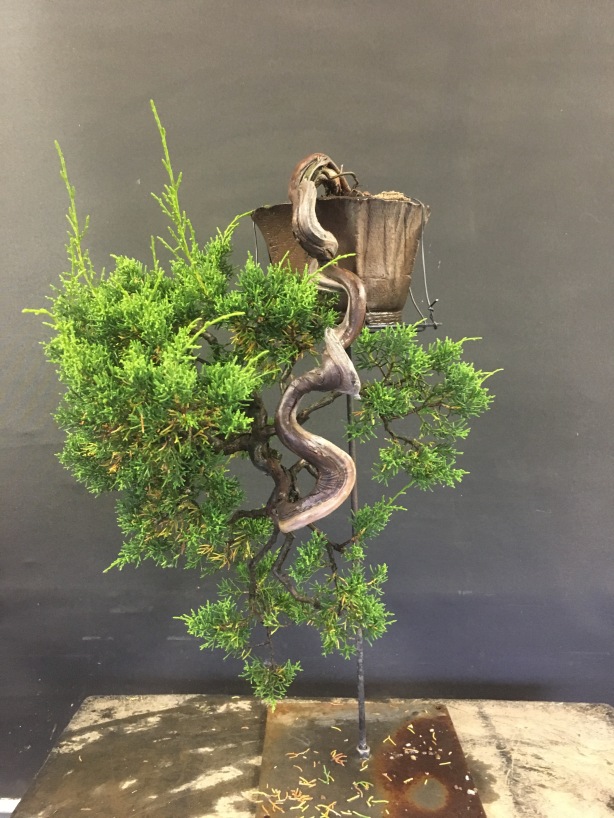
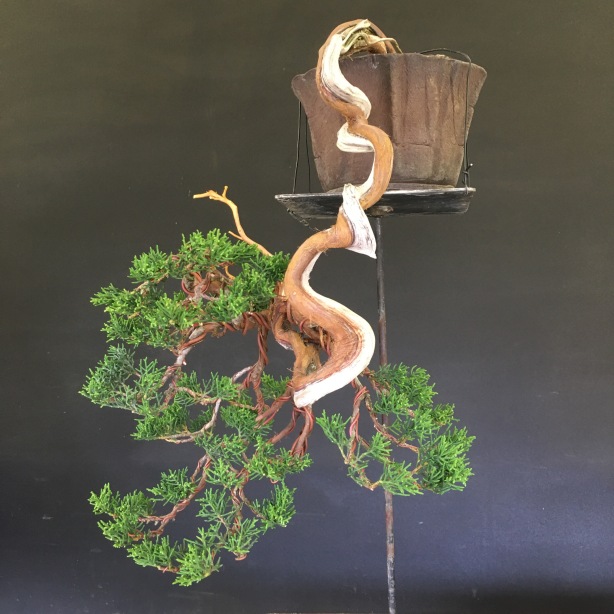
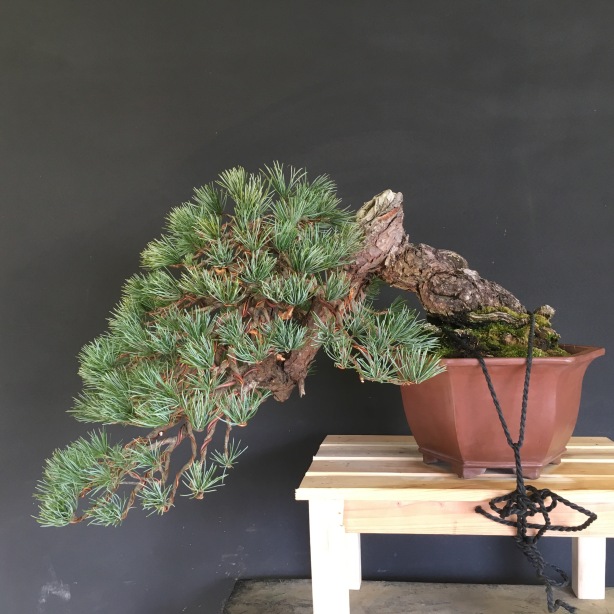
Another tree that I was given to work was a small cascade.


The tree was bought and repotted quickly a good year ago and wasn’t in great health at the time. One of my Sempai was watching Oyakata re-pot it and stated the was a good chance it my die. Since then the tree has grown in strength and made it through it all.

Oyakata asked me to wire it now it was in better health. It was a bit of a challenge has it had been changed from bunjin to kengai and structure had to be completely reset.


Overall I was pleased with result and its set it on a path of improvement but, still has a few years to really fill out and reach its potential.

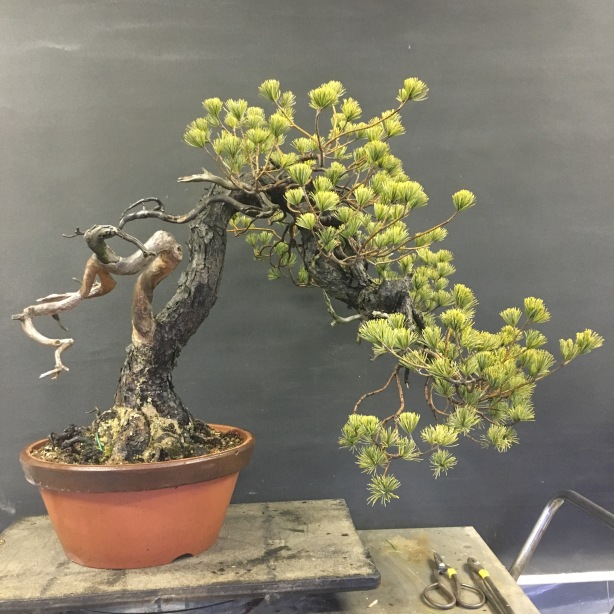
A chuhin Shimpaku that has been here for a couple of years or so, finally got it’s first styling by myself.

The tree had been re-potted and cleaned up back when it first arrived but, hadn’t been touched apart from basic maintence since then. Another apprentice brought the tree to the work shop for maintence but, Oyakata asked me to wire it instead. The photo above was after I had removed all weak foliage and cleaned the live vein. 

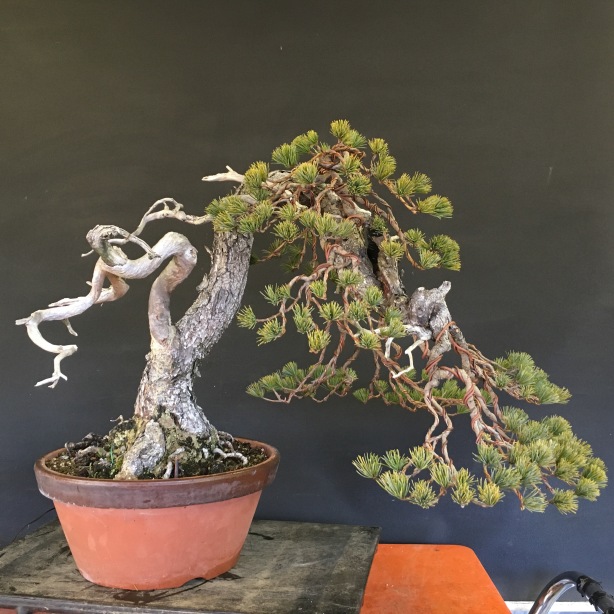
I then proceeded to wire, setting new structure as the front was changed and finished with cleaning the Shari & lime sulphur. 


I really want the foliage to gain in size fill out more, so it’s more proportionate to the dead wood and also envelope around the Shari more so, as to break up the powerful Shari more than it is now. I tried my best to bring the foliage and the Shari together but, it’s the best I could do for now though.

Thanks for reading I hope you enjoyed seeing some of my work.

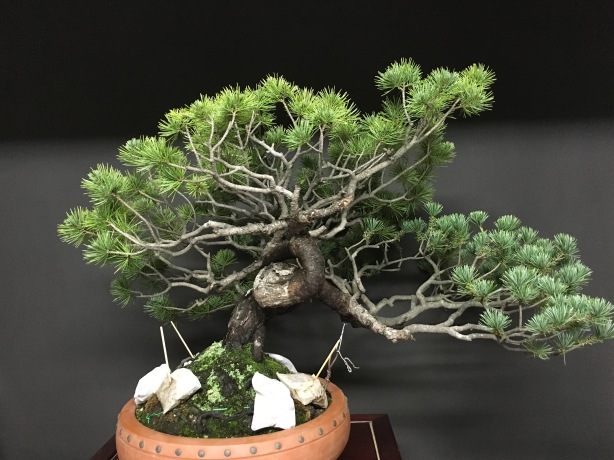
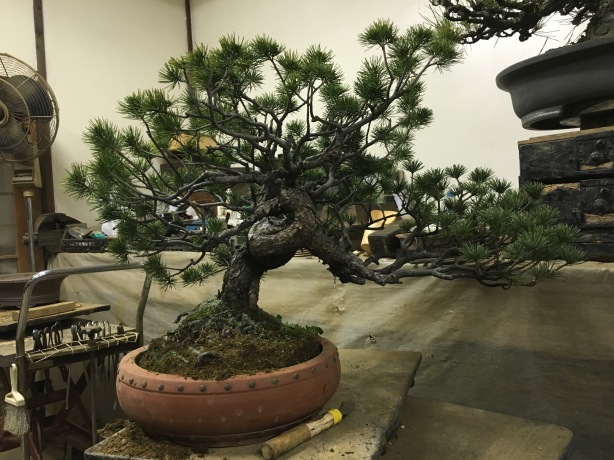
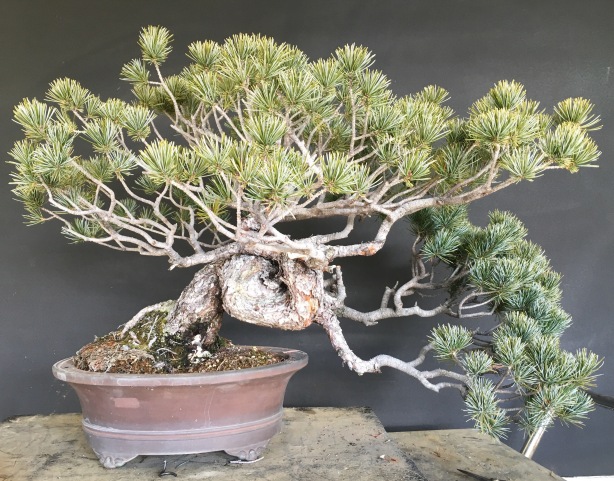
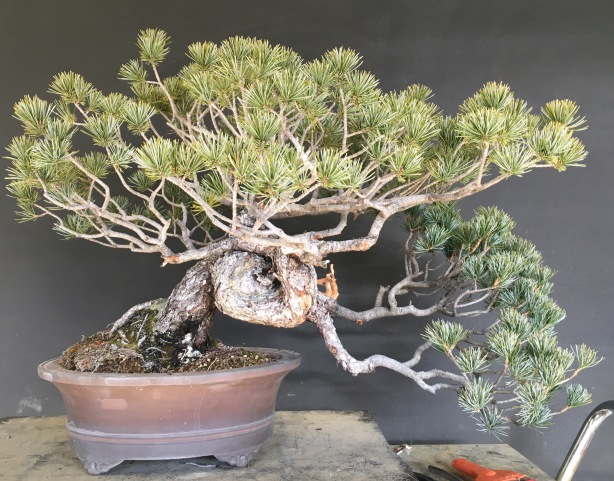
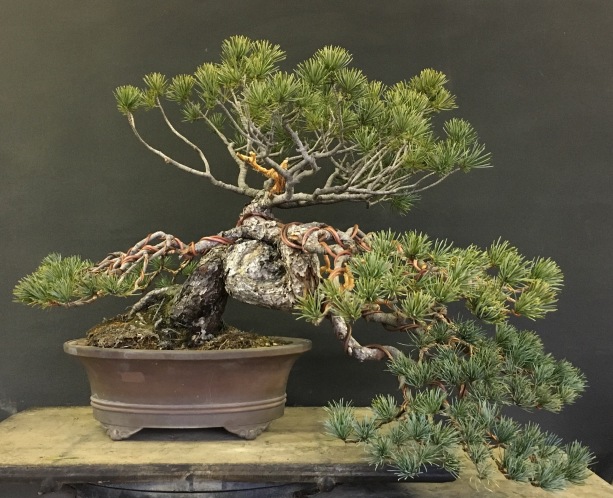
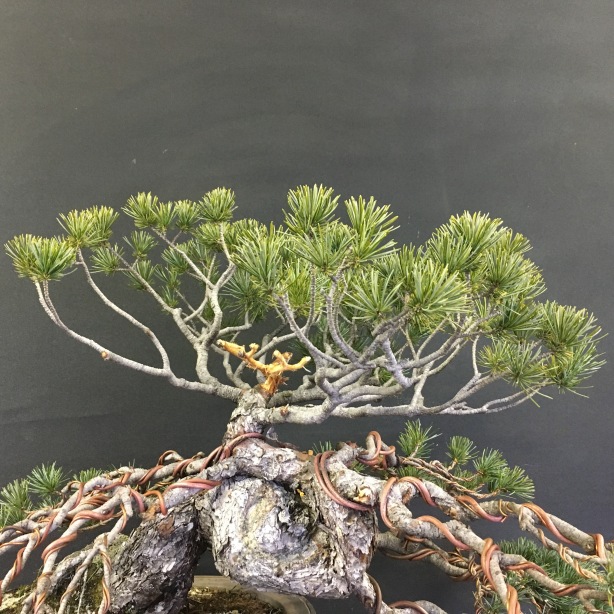
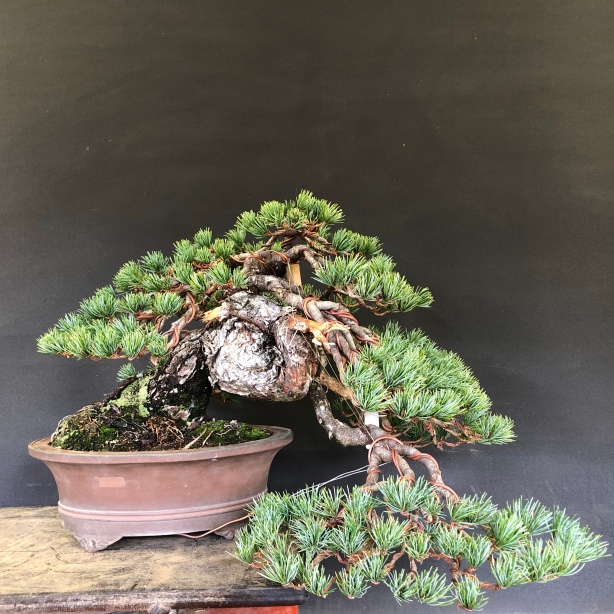
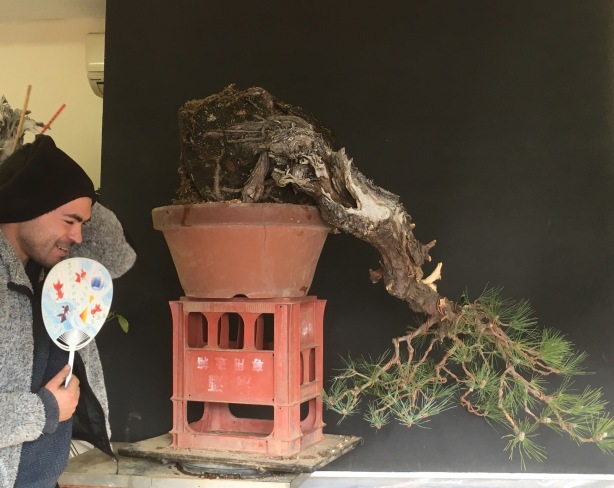
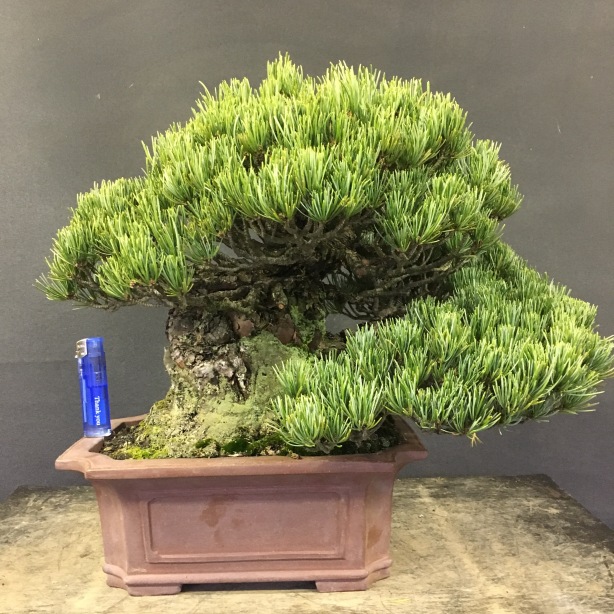
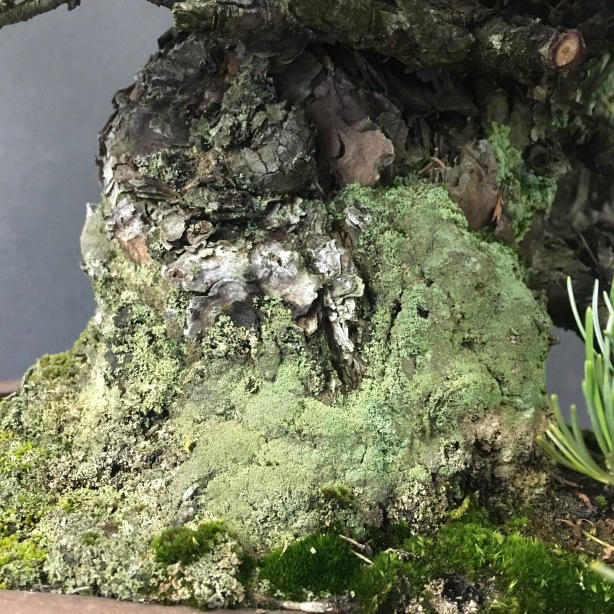
Around five years ago at a visit to Ken Fujiwara’s nursery I was checking out the tree’s and came across a white pine that caught my eye. It had very good leaf and looked healthy. It had some inverse taper though and I wasn’t sure if it was grafted on to black pine or if it was natural white pine. After a chat with my Sempai he confirmed it was grafted and that was why it had inverse taper. The bulge did have Shari to it one side and this gave that area some interest and not only a bad point. I could see that the tree had some potential and I knew it was bendable so, I proceeded with asking a price. Being as it was grafted on black pine it made the material more affordable for me, otherwise it probably still would be expensive as a natural white pine and Oyakata said he would of bought the tree if it was natural white pine. Setsu Goyomatsu can still command high prices if the are very good tree’s otherwise they have a tendency to be cheaper. I decided that I wanted to try to make the tree even though I didn’t know how exactly but, I thought there is a good tree in there.

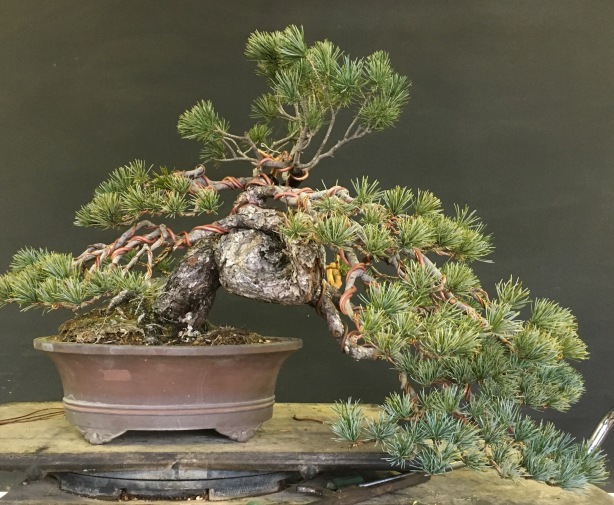
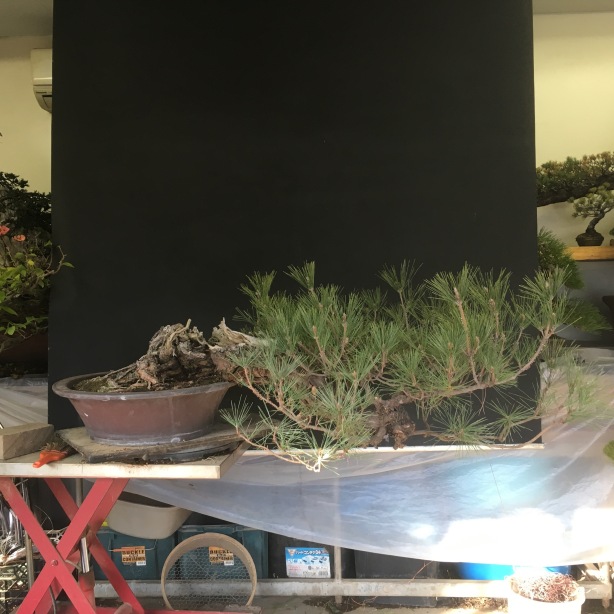
One day when I had some free time at night I started working on the tree. Unfortunately I lost the photo’s of the initial bend before but, this is the tree in October of 2015 near the end of one growing season after I bent the tree. The big bend was bent best part of forty five degrees.


As you can probably see the tree suffered a little on the top where it had the hard bend.


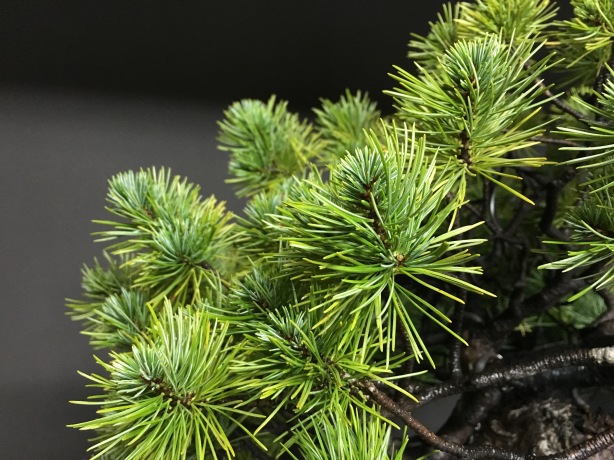
You can see more clearly  from these two pictures. The first is the top of the tree and it pushed weakly with short new needles compared to the second photo of the bottom bench which was not so severely bent. It was this point I was glad I didn’t work the whole tree because it possibly could of been too much for the top section and died. With any type of tree, bending hard and later wiring is the safest option but, knowing your species and how far you can push them is paramount. White pines are certainly more tricky even when they are strong compared to other species.

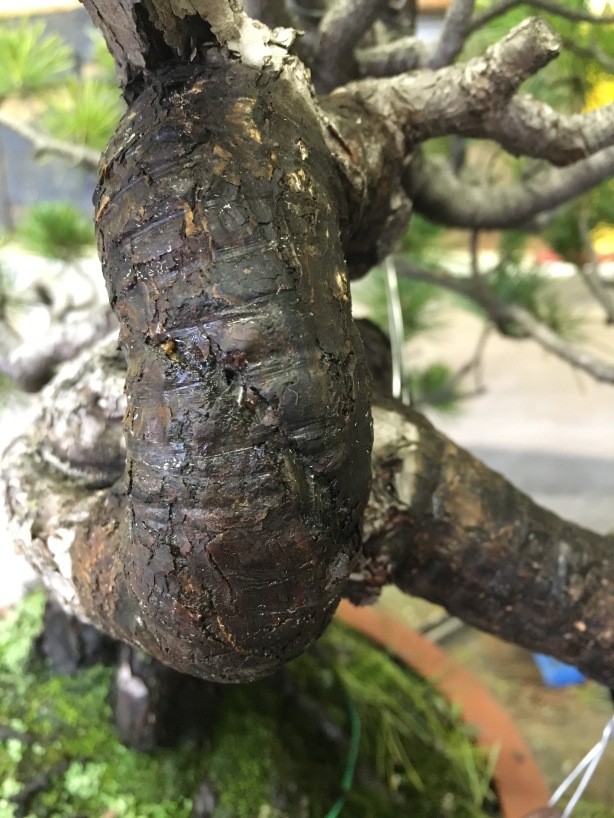
Here you can see the damage and Shari caused from the bend after I removed the tape.


The tape doesn’t stop the damage happening but, helps to limit and hold the bark, cambian, etc.

I then followed up with some maintenance to try to help balance and strengthen the top part.

I left the top half alone, leaving all needle and on the strong area I cut all old needles leaving only this years needles. This is to open up the strong area, let light in and potential new buds from the cut needles can still form. Leaving the weak area should help to strengthen this part and give it the best chance to catch up with the lower branch.

This how the tree looked after the sessions work.

I then decided to re-pot in March 2016, to strengthen the tree and get into a better mix also to adjust its angle ready for its styling.


This was a quick snap mod re-potting, is isn’t take an after pick at the time and forgot to take later as I think it was getting late.

The tree was then left to grow and the only work for that growing season consisted of some candle pinching on the strongest of shoots on the main branch.


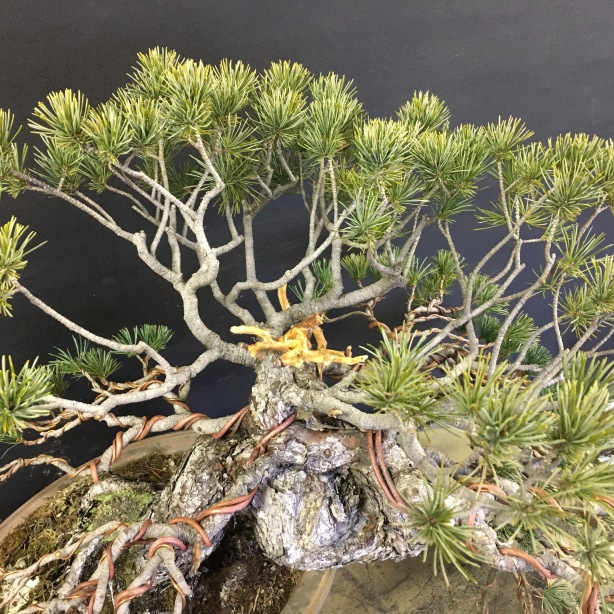
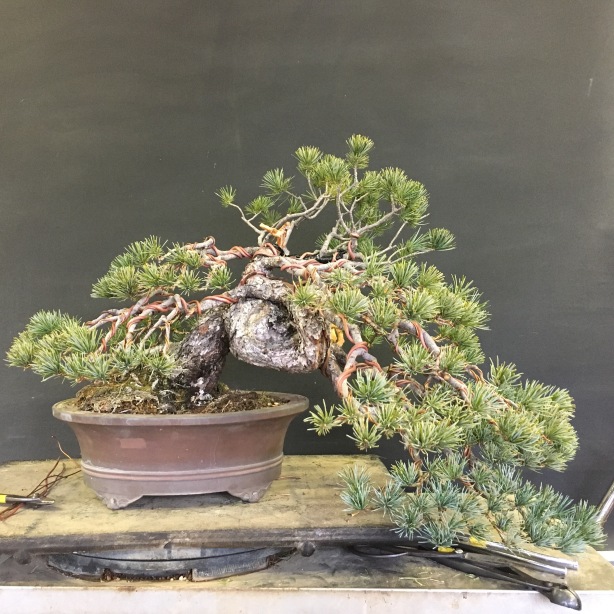
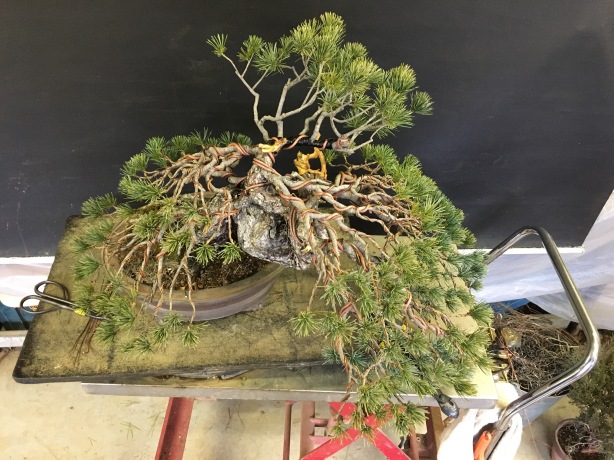
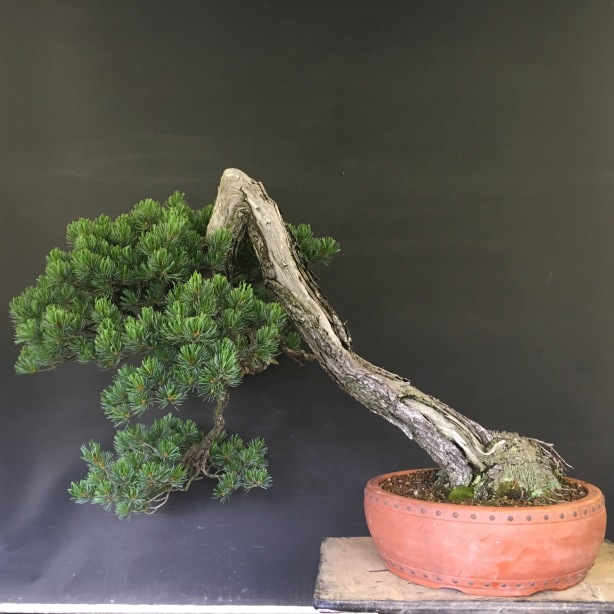
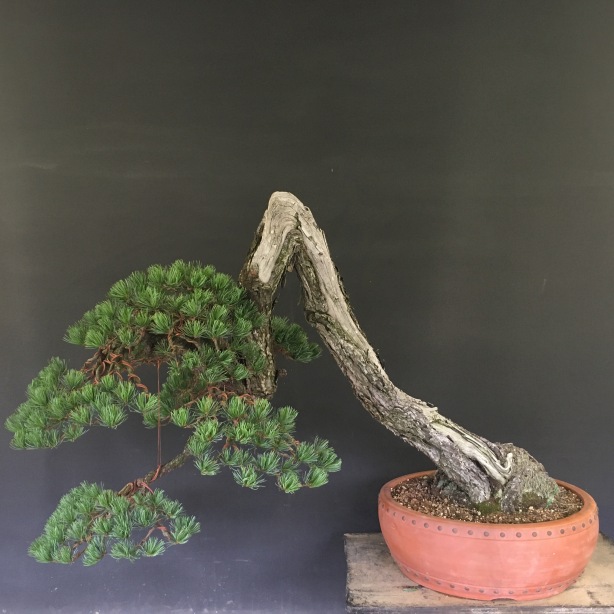
This is the tree in its new pot with the chosen front. The top half has got stronger but, still not quite caught up to the main branch on the right. The ceramic choice is maybe my favorite style of pots, of course not suited for every tree but, I believe a good choice for this one. I love very deep powerful ovals such as this one and this has just enough femininity to use with a white pine in my humble opinion.

Even still I decided it was ok to style and wire the tree.

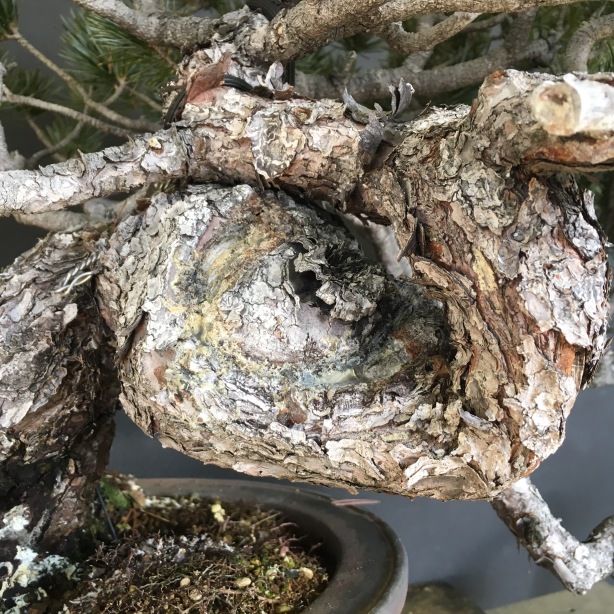
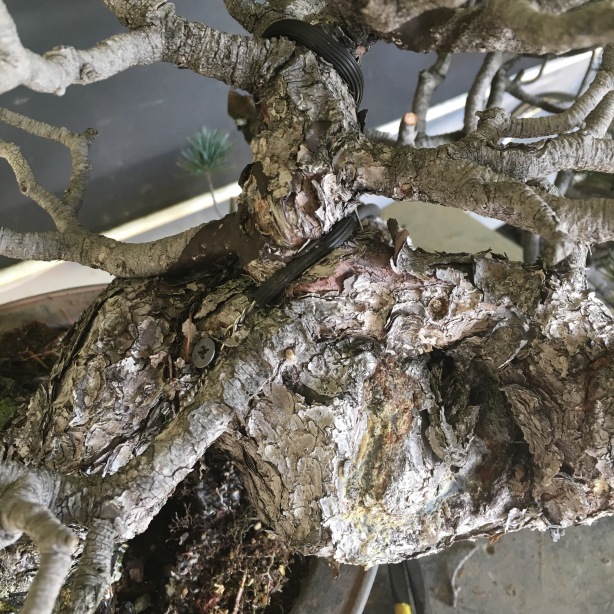
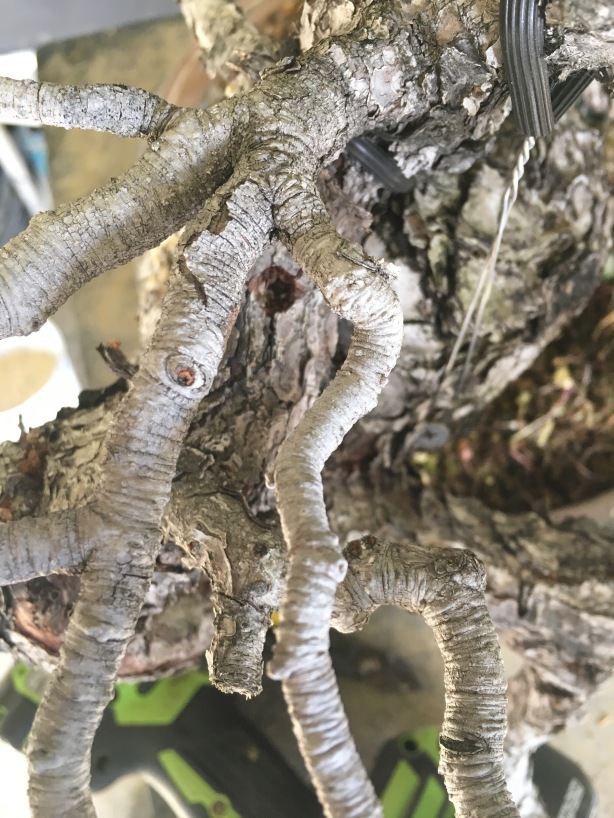
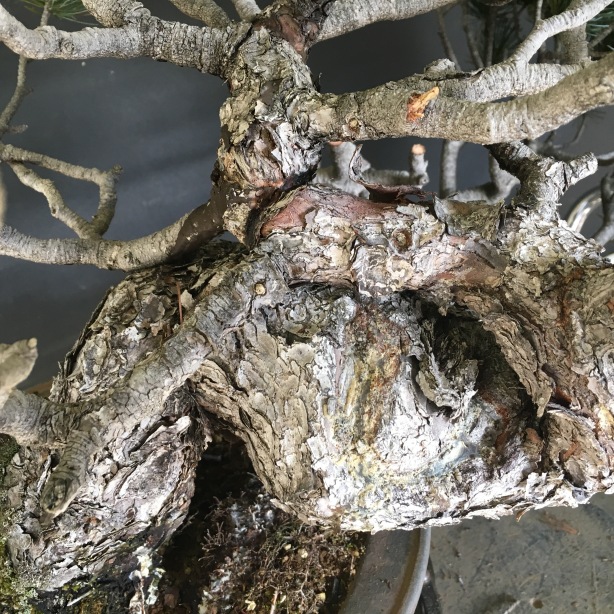
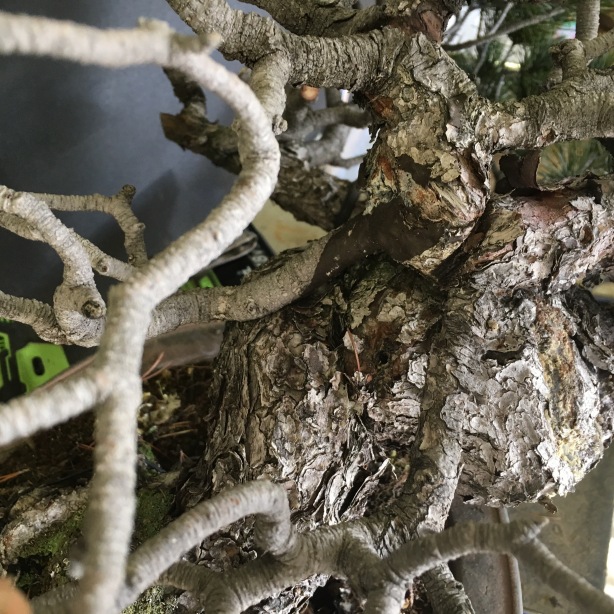
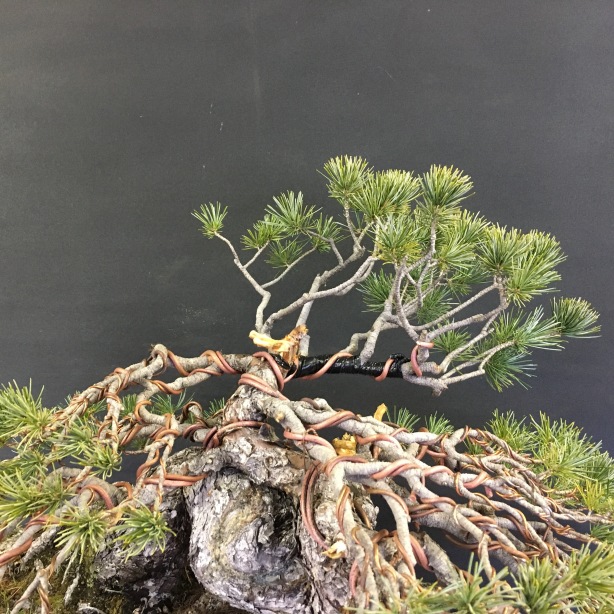
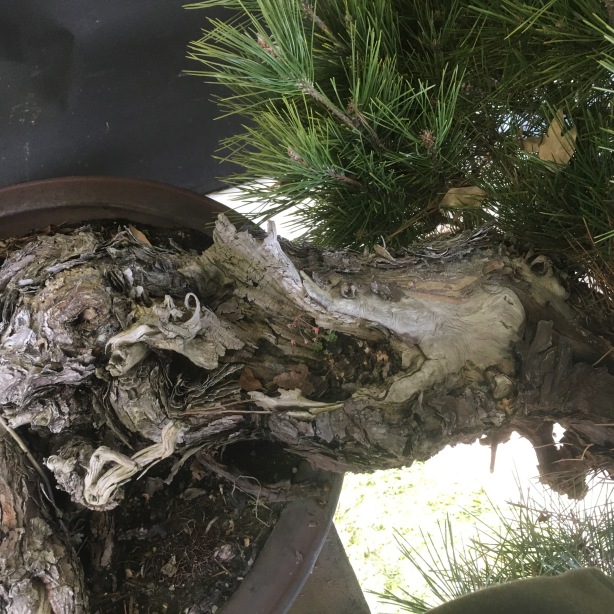
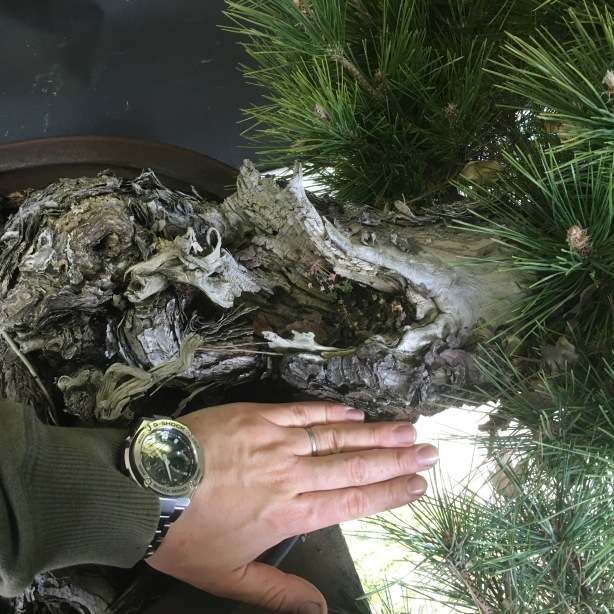
Here you can see the detail of the Shari ball which is to be the focus and main interest of the tree. With the combination of the bend and angle change the tree looses most of its inverse taper and crates an interesting swirl of movement for a main trunk.

The start of the work consisted of running a screw through the bent part of the trunk to ensure that it wouldn’t move after I removed all the guy wires. I then proceed to remove all all needles and some new needles on the strong branch because it was still very strong and to give space to wire. I was only going to remove old needles on the weaker part if I needed to as I wired. I also cut any branches and made Jin which weren’t needed.

The tree then ready, I went on to wire one branch at a time starting with the main branch and working up.


I went branch by branch till I got to the apex. My analysis of the top was that it wasn’t the easiest to make but, had several options. There are three branches and all could be used. I discounted the already natural apex as it was too long, was difficult to fit and I couldn’t use it to fill in the top because it would always look like the tip of the apex if I left it. So I cut it out and the Jin you see in the picture above is it. It’s not always the best move cutting out parts you can use as the apex especially if you want the tree to look full but, in this case it had to be done to create better structure.  I was then left with one viable option in my mind as the other possible option had to be used to make a pad on the left.

I then laid down the left & the right branch and taped the back branch. My plan was to curl the branch around to fill in and form the apex. I felt it was the fullest, strongest and would make the best top on an already leggy apex.


I then curled the branch, following the curve, up and forwards using my jack (for ease and control) and a guy wire connected to the jin & wire.


I then wired the apex and this was the result after a little fixing.

I wasn’t really happy though and felt like the second branch on the right was hiding the nice sweep of the main branch which I wanted to show. That led me to taking it out and cutting it off.

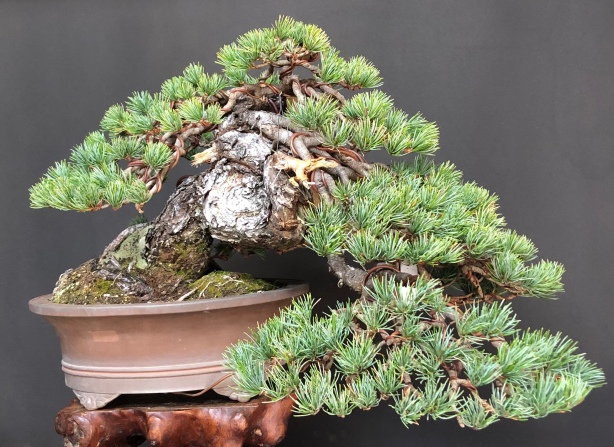
This was the finished tree after it’s first wiring but, it still has a long road ahead of it to eventually become a bonsai. I’ve tried my best to be patient with this tree’s progression but, still try to push to develop it quickly enough. It’s not always easy with white pine knowing how far you can take them without going over the edge. From my experience I feel harder styling should be left in the dormant time, when the tree is strong and this is when I have had my best results.

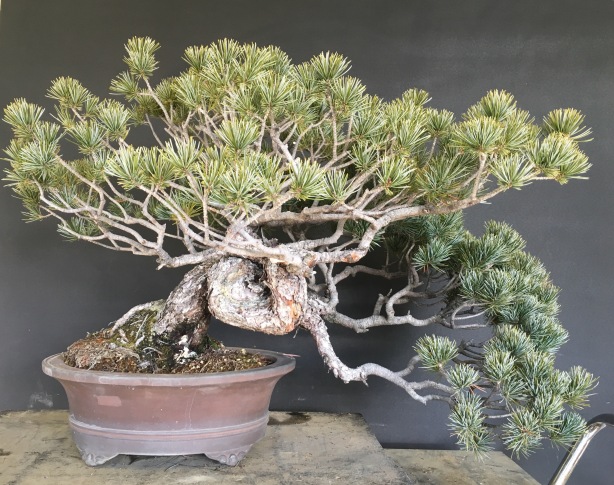
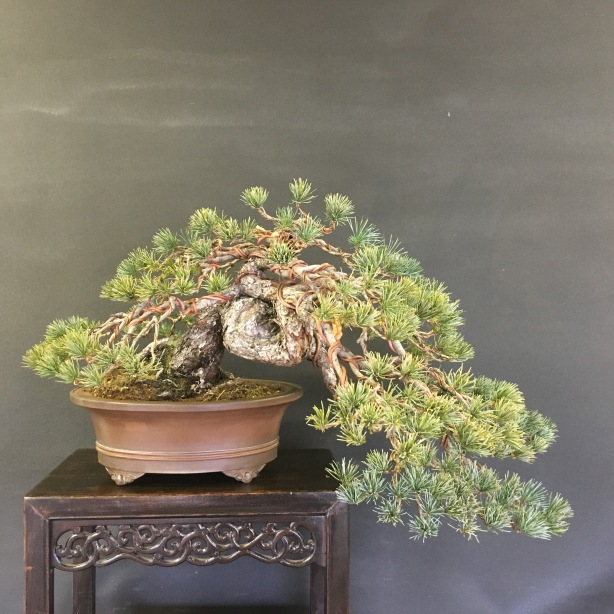
Moving forward about another two years the tree has only been maintained with old needle and wire removal. I had the tree back in the workshop ready for a re-wiring, older and wiser hoping to improve on what has already been done.

Here I had already cut off a secondary branch from the main branch and the old secondary branch. My reasoning is to compact the tree as it’s grown out a lot and to make a more chuhin size. Another thing is to open it up if the balance branch was kept it would of hidden too much of the trunk. I then continued to wire brining down branches and spreading the apex so in time it will fill out better.

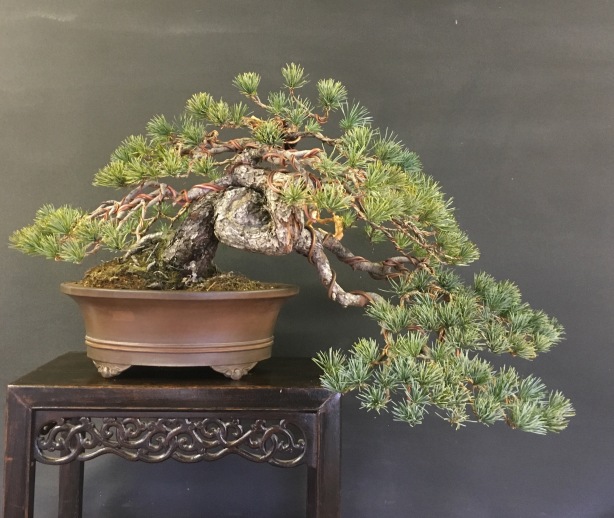
This was my initial finished image for the moment but, reviewing the photo Some changes need to be made. The apex is a little narrow for the moment but there isn’t anything that can be done for now about that but, It will fill out in the future considering it was so leggy.

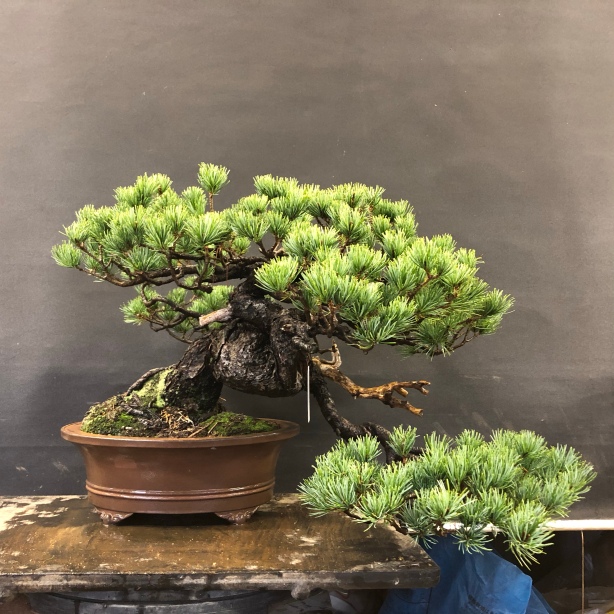
What I wasn’t happy about is that the main branch and how separate and in compact it was. It was highlighted more from a photo, than in person. So using a guy wire I pulled it up and in to try to correct it.

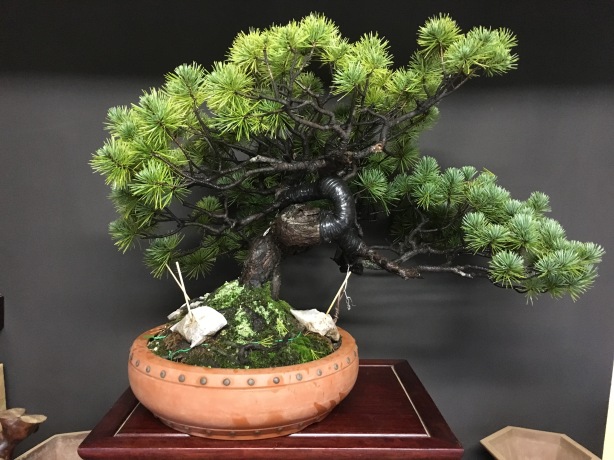
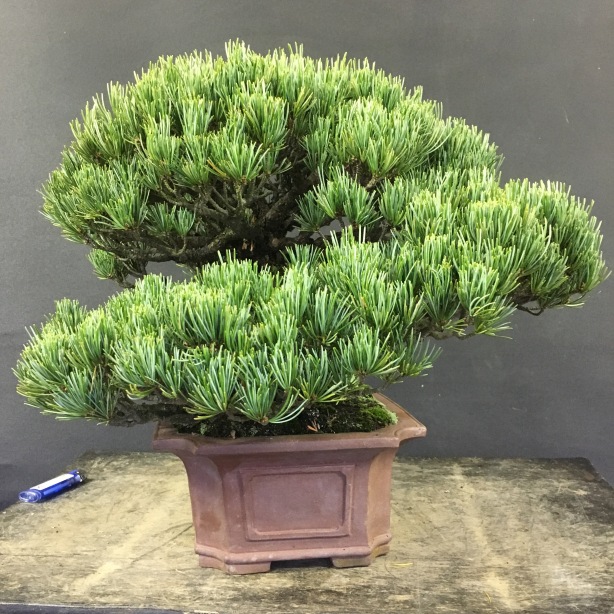
This was the final image for now . I’m looking forward to see it develop, fill out and mature. It’s amazing how much it has thickened and changed in this short time.

Here is a short video, to give a better idea of the trunk.

Thank you for reading and merry Christmas everyone!

Roof Goyo

Posted: February 15, 2017 in Uncategorized

This white pine has been living on the roof of Aichi-en since I have been here and is a piece I’ve always admired. It has good leaf, old bark and interesting movement. It is a tree that Mr Tanaka bent the trunk a long time ago, it was a hard bend for such a thick trunk (about 6cm). For some unknown reason the second trunk on died a year or so ago, strange as this trunk wasn’t bent hard (This is the crazy Jin near the base). It was unfortunate because as a twin trunk it was a little more unusual and unique. However these thing’s happen and we have to make the most of the material that it is now. It was re-potted into this terra cotta growing pot, has since gained strength and is now ready for a styling.

The old needles had already been pulled so I set about wiring the tree, bring branches down and making pads.

It’s wasn’t the easiest of tree’s being quite leggy and it has a long way to go to fill out but, hopefully in a little time it will be on its way to being a bonsai.

Not every body knows but, Aichi-en has two plots of the nursery a couple of blocks apart. The second area which is least know, we refer as the field. It contains very low concrete benches and a little growing bed area. Most of the tree’s there are very raw, in development or just too big too fit on the nursery. They are watered and mainly taken care of by Mr Tanaka’s mother and acts as an overflow. Recently a Chinese buyer bought about ten field grown black pines and when we where there loading them on to the truck Mr Tanaka asked us to bring back this tree for me to wire.


Most of the tree’s their are nothing to write home about but, there are a few gem’s amongst it all. This tree is one that me and Juan had eyed up a long time ago because we knew that it had some potential to make a nice tree one day. It’s an old collected tree but, still very raw and reminded a little of the collected material back in Europe.

The main feature of the tree is the old shari on the trunk and this is what I wanted to show in styling.


To start off I pulled needles and cleaned the inside of the sabamiki to see what branches & structure I have to use.


I removed a few ‘definate don’t need branches’ and looked at both sides. Either of them could be made both having plus and negative points. In the end though I went with my initial gut choice and what I believed would make the best tree in the future.


Somewhere around this and having made the decision I gave Martín the all clear to remove a big branch going up.


If I had chosen the opposite side as a front then this would have been the main branch, which was one of the main plus sides of using the other side, it being thicker and older branch. Using this side though, it was useless and had to go.

I then set about wiring the branches into place. It wasn’t the easiest of styling’s, with young branches black pine can be very brittle but, they are strong and can handle a few small breaks.

Finally with an up-potting here was the initial styling result.


It’s still very raw and has a very long was to go but, I hope it’s a step in the right direction and on its way to being a bonsai one day.

As I was taking the final picture a happy geisha came to view the tree to my surprise, just like you see in pictures of exhibitions in Japan!

Back along Mr Tanaka came back with a new kifu sized white pine.


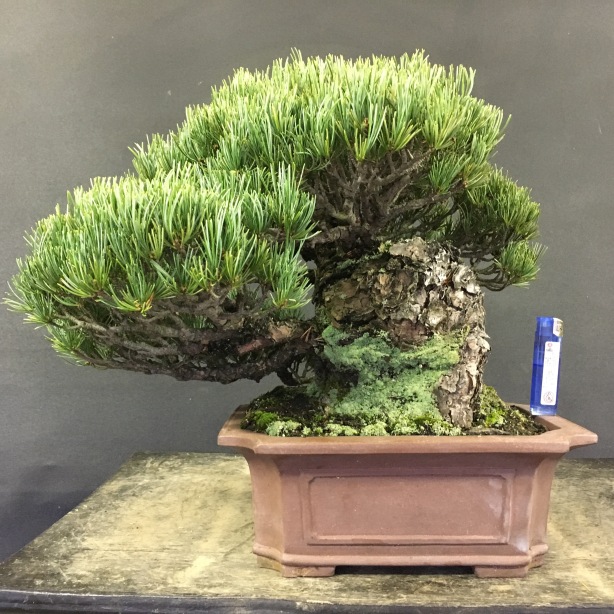
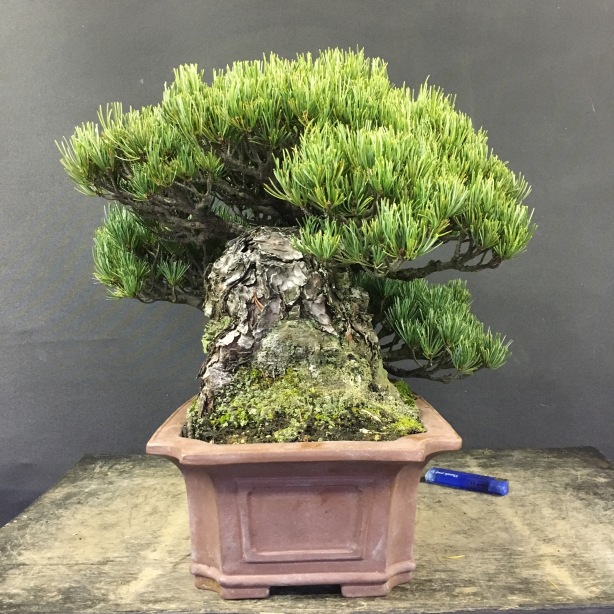
The tree is setsu-goyo/grafted on to black pine base which many of us are familiar with being as many are exported around the world. Favored for their strength and size. This one however is very old, older than many you see and sets it apart some what. 

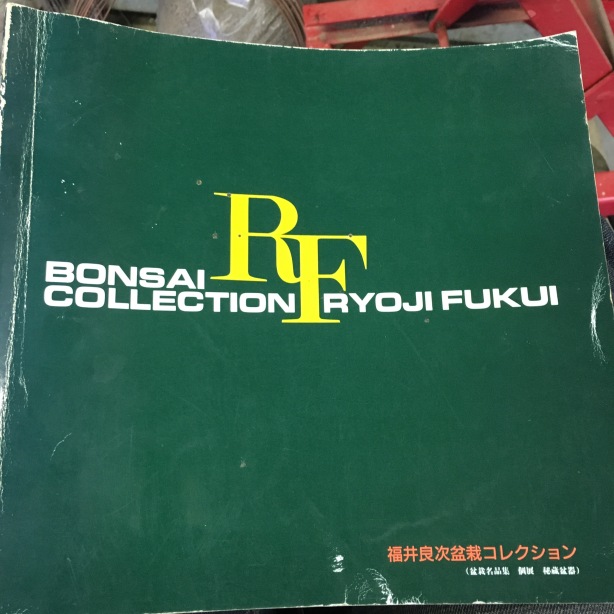
This tree also belonged to a famous collecter and customer who has since passed, Mr Ryoji Fukui. A  customer of shokuji-en(Ishi-San), formally residing in Nagoya and now Inazawa, it was the most famous nursery in Nagoya. Shokuji-en is famous for shohin bonsai and  Fukui-San was a shohin collector but, also had some very nice big tree’s.

There is a published book of Fukui-San’s tree’s but, this tree does not feature in it. The book contains many we’ll known tree’s including Kokufu winner’s.


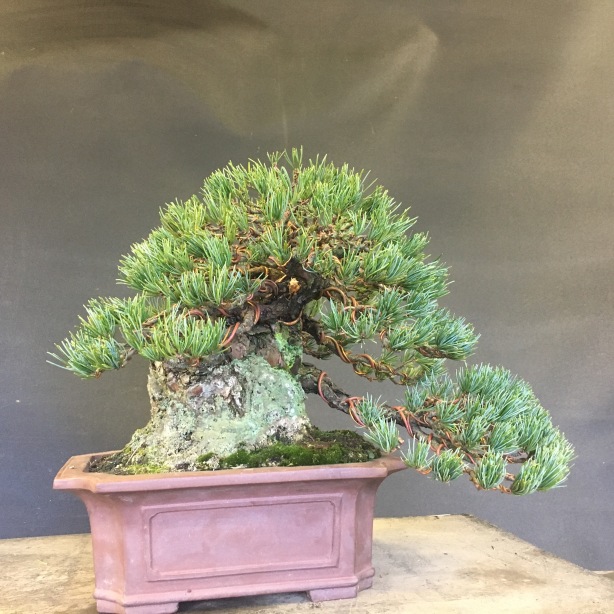
I set about working the tree according to Mr Tanaka’s instructions with a slight front change. I had remove a branch at the front to show the trunk. 


It had been some time since the tree had been worked, was leggy and really needed a structure set. The tree also could do with a slight tilting to the right and in the future a more suitable pot change to show the real power of the tree. I look forward to seeing the pot selection Mr Tananka chooses and how much it will change feel of the tree in the near future.

This white pine came to Aichi-en about two years ago, it has since been re-potted to change the angle a little and left to get healthy. Mr Tanaka got for a good price and knew with a little work it would make a nice tree. It’s old and has some cool shari including some interesting ita-shari at the top. This is quite unusual with white pines and more commonly found in Shimpaku/Chinese junipers.
As I set about wiring it, I tried to consider the tree and its style. Being slanting with a slight bunjin feeling, I wanted to make the pads powerful enough to fit in with the chunky trunk but, not so heavy that it lost its mountain, literati feeling. I kept the main branch as one pad and tried to break the tree up more further up.


For me the tree at the moment looks too clean for its style. It should look more natural  more bunjin style foliage pads but, for now this was development work and setting the structure. Give the tree one or two years growth the pads will naturally soften up.

One day before Mr Tanaka was set to go to Kokufu he asked me to style this tree for the sales area.


At the time it was just before we watered, it was close to lunch and I need to leave early that day (about 3:00) for personal reasons. Mr Tanaka and the guy’s were heading off to a customer’s for work after lunch.

The tree had been bought previously bought by Mr Tanaka on-line. It is old, good leaf and many things going for it. The only problem with the tree from an earlier inspection is its bad branch structure. Knowing this and with my time limit I knew my work was cut out for me (apprentice pressure). 

So I set about wiring, cleaning the tree and pulling old needles as I went. Quickly we got called for lunch but, I ate fast and I went back to work straight after (not really any time for a lunch break).

I didn’t have so much time to pontificate about which branches to cut or keep but, I tried to keep to Aichi-en style and improve structure best I could with still trying to make the tree look nice.

This was the final result.


I thought that it didn’t turn out too bad but, Mr Tanaka decided not too take it. Not sure if this was because he felt it wasn’t good enough or just decided to keep it. 

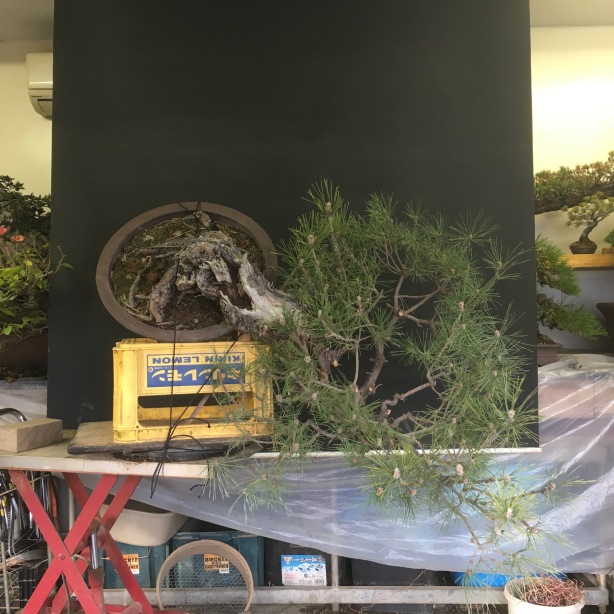
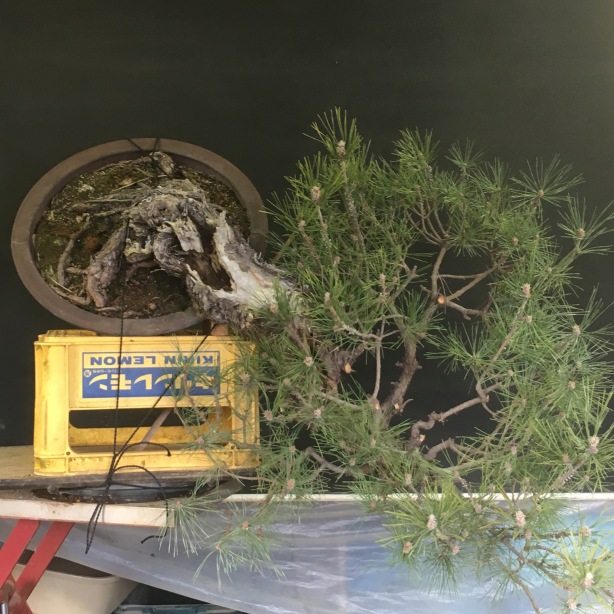
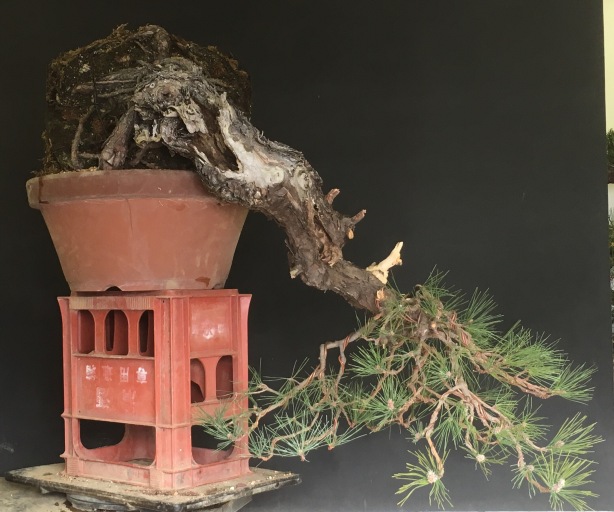
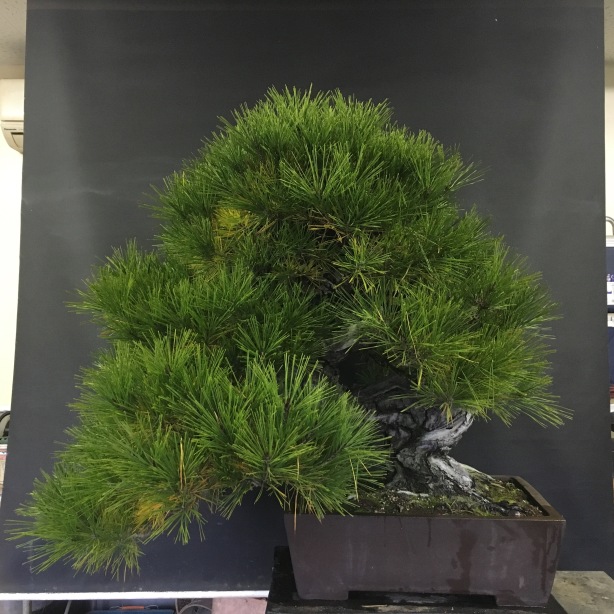
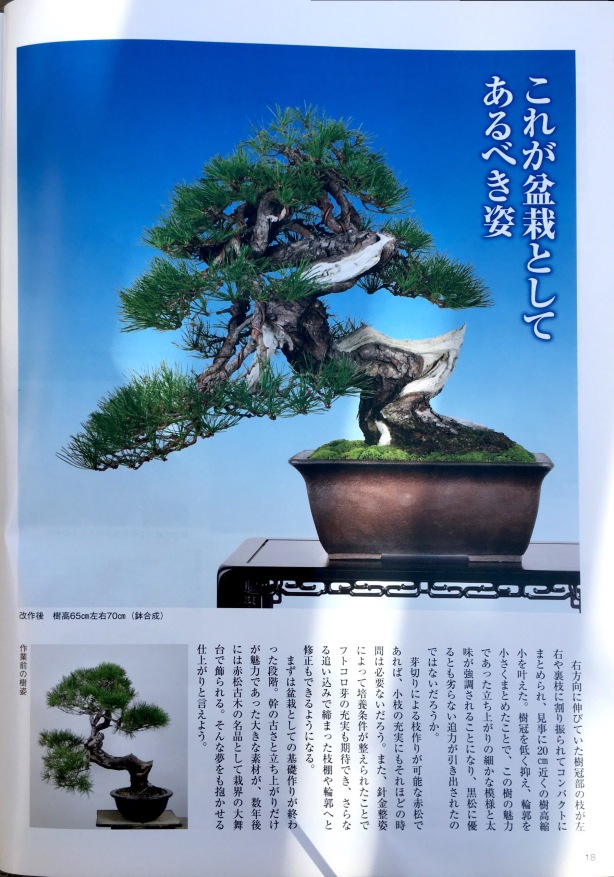
A little while back i was given this akamatsu/red pine to wire. 


This tree was first styled back in 2012 by Mr Tanaka for an Kinbon article.

As you can see the transformation was truly impressive and some awesome work. It completely altered the tree making compact and balanced. However as in any process of making a bonsai tree this is only the first stage and is never instant.

Following the styling only maintenance work has been performed on the tree. This included de-candling, pulling of needles and general care. 

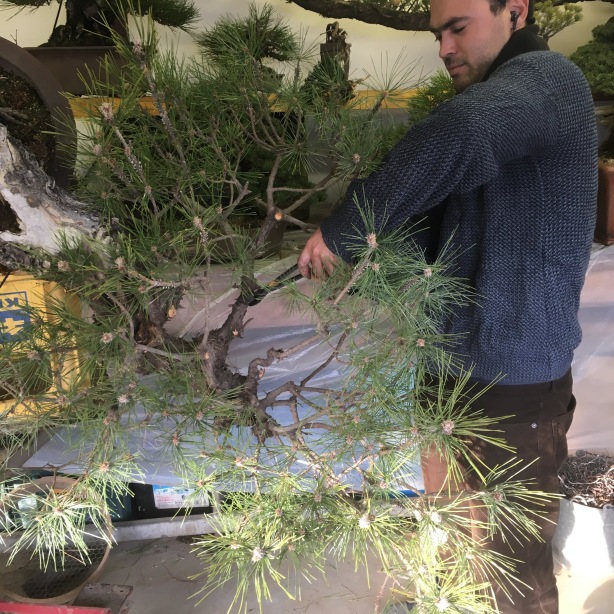
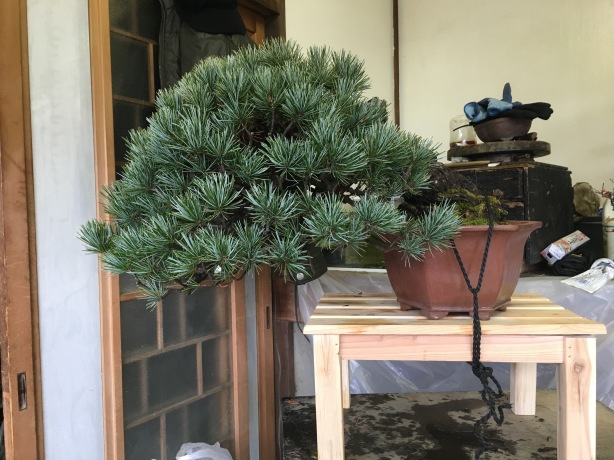
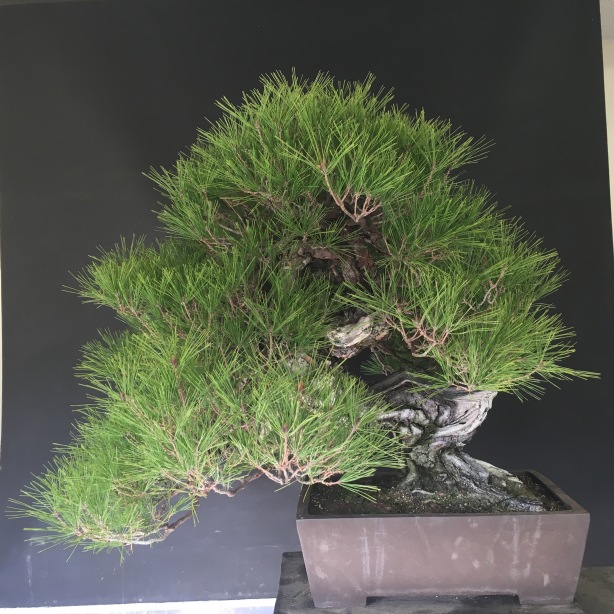
The tree wasn’t de-candled last year and now was starting to loose shape. Mr tanaka decided it needed a second wiring and asked me to wire it. I started by pulling needles and removing any branches that had died.


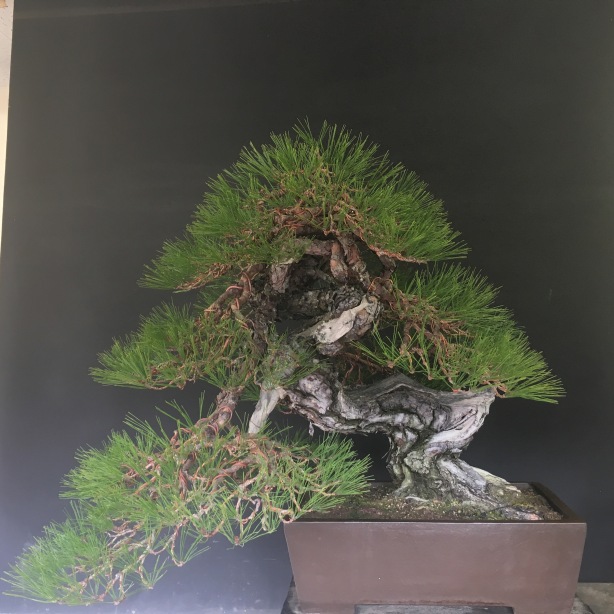
After pulling the needle’s it’s easier to see how much the tree has got out of shape from a picture and it required cutting back quite a bit in areas to bring the tree back to shape.


This was the result after I finished wiring. 

I was pleased with it and Mr Tanaka only cut one small twig as his corrections. Before red pine where closest to the least favorite specie to work with but, my appreciation of red pine has only gone up & up recently, now to the point I believe they are one of the best in many ways.